After the initial setup of the services, we can install the PHP files to implement Stage 1 of the Library Pi. This stage will allow us to upload zip files with JPGs, store the files and information in a database, and then use the Internet Archive BookReader component to view books.
Note that you can download a zip file of a Raspberry Pi disk image backup of Stage 1 here ( NOTE: you will need to run sudo raspi-config to expand file space)
Or, you can also just download the Zip file with the Stage 1 PHP files here (you still need to create the database, and setup lp_dbconf.php):
At the end of this page is a set of steps to test the new website. You can download a small sample book to use here:
Data Model
The first stage data model will be very simple, and just support book and page data using 2 tables. You must use the MySQL script below to create the database as well as the two tables and indices:
create database if not exists  lp;
use lp;

create table if not exists lp_book(
 id integer  NOT NULL AUTO_INCREMENT,
 title varchar(128),
 ukey varchar(32),
 PRIMARY KEY PK_lp_bookz (id),
 INDEX ilp_book (ukey)
);

create table if not exists lp_page(
 id integer  NOT NULL AUTO_INCREMENT,
 book_id integer,
 seq integer,
 height integer,
 width integer,
 status char(1),
 filename varchar(256),
 PRIMARY KEY PK_lp_page (id),
 INDEX ilp_page (book_id)
);
Use MySQL Workbench or your MySQL client to execute the above against your MySQL database.
The lp_book table stores a unique ID for our books, as well as a title and a ukey. The ukey field will hold a unique 32-character key for the book. The ukey value will be used in URLs to identify the book, so visitors can’t just modify the URL and start stealing our book data. The lp_page table holds information about the pages for the book. One book will have one or more pages. The pages have a seq field so we can control their order later, as well as a status field that we will use for additional processing later.
BookReader
We are going to be using the Internet Archive BookReader for displaying the pages. You can find information and downloads on the book reader here: https://openlibrary.org/dev/docs/bookreader
This open source reader should be setup in a bookreader sub folder of /var/www/html, or where your website will be installed. The files in this folder should be as follows:

The PHP files below, specifically the reader.php file, will be using these files and expect them in this specific location.
PHP Files
These PHP files can be installed in the /var/www/html folder of your Raspberry Pi. You should remove the index.html file that is there now. We are going to put most of our logic into a reusable ‘LP’ class, so you will find that most of the PHP files are pretty barren (except for lp.php where the LP class resides). Keep this mind as you review the PHP files: all the real work is done in lp.php.
You can also just download the files:
You can just download the PHP files for the website, but they are described here:
lp_dbconf.php
This file serves to centralize our database connection settings and code. It’s not very robust now, but can be enhanced later for things like failures to connect to the database. All other modules we create will include this for simple access to our MySQL database.
<?php
 $GLOBALS[ "db_srvr" ] = "localhost";
 $GLOBALS[ "db_user" ] = "root";
 $GLOBALS[ "db_pass" ] = "(your MySQL password)";
 $GLOBALS[ "db_data" ] = "lp";
@ $GLOBALS["db"] = mysqli_connect( $GLOBALS[ "db_srvr" ],
      $GLOBALS[ "db_user" ], $GLOBALS[ "db_pass" ],
      $GLOBALS[ "db_data" ] );
 if( !$GLOBALS["db"] )
  die( "Database connection failed.  Please check settings in " . __FILE__ );
function db()
{
    return $GLOBALS["db"];
}
?>
index.php
This is the home page. It’s going to display our menu and a list of books to be read. Of course, it doesn’t really do much, except ask the LP class to do the real work:
<?php
 include_once( 'lp.php' );
 $lp = new LP();
 $lp->HTMLPageTop();
 echo $lp->BookList();
 $lp->HTMLPageBottom();
?>
upload.php
Upload.php will offer the users a very simple upload form, and also accept their uploaded files. Again, lp.php does the real work.
<?php
 include_once( 'lp.php' );
 $lp = new LP();
 $lp->HTMLPageTop();
 // If we find this field, the user posted data.  Save it
 if( isset( $_POST[ "ispost" ] ) )
 {
    if( $lp->AddBook( $_POST[ "book_title" ]) )
       echo "Uploaded";
    else
       echo "Error: " . $lp->Err;
 }
 else
 { // If they didn’t post data, display the input form
 ?>
 <form method="post" action="upload.php" enctype="multipart/form-data">
 <input type=hidden name=ispost value=\"Y\">
 Book title: <input type=text name=book_title><br />
 Zip file: <input type="file" name="zip_file" id="zip_file"><br />
 <input type="submit" value="Upload" name="submit"><br />
 </form>
 <?php
 }
 $lp->HTMLPageBottom();
 ?>
The key to what’s going on above is that we are seeing if a POST variable exists. If it doesn’t then we display an HTML form to the user so they can upload and name a book. If the post variable does exist, then we call the AddBook function in the lp class to actually add it to the system.
reader.php
This is the second most complicated file here. This is the reader page that will allow users to view the uploaded books using the Internet Archive BookReader. Most of the code here is for setting up the BookReader for use. We are also using a healer file, reader.js which contains most of the Javascript needed to implement BookReader. See the BookReader section for more information.
<?php
 include_once( 'lp.php' );
 //This section sets up the headers needed by BookReader
   $Header =
 "<link rel=\"stylesheet\" type=\"text/css\" href=\"bookreader/BookReader.css\" />\n" .
 "<script type=\"text/javascript\" src=\"bookreader/jquery-1.4.2.min.js\"></script>\n" .
 "<script type=\"text/javascript\" src=\"bookreader/jquery-ui-1.8.5.custom.min.js\"></script>\n" .
 "<script type=\"text/javascript\" src=\"bookreader/dragscrollable.js\"></script>\n" .
 "<script type=\"text/javascript\" src=\"bookreader/jquery.colorbox-min.js\"></script>\n" .
 "<script type=\"text/javascript\" src=\"bookreader/jquery.ui.ipad.js\"></script>\n" .
 "<script type=\"text/javascript\" src=\"bookreader/jquery.bt.min.js\"></script>\n" .
 "<script type=\"text/javascript\" src=\"bookreader/BookReader.js\"></script>\n" .
 "<script type=\"text/javascript\" src=\"reader.js\"></script>\n";
    $lp = new LP();
    $BookKey = isset( $_GET['bk'] ) ? $_GET['bk'] : "";
    $lp->LoadPages( $BookKey );
    $lp->HTMLPageTop( "Reader", $Header);
 ?>
 <div id="BookReader">
 BookReader <br/>
 <noscript>
 <p>
 The BookReader requires JavaScript to be enabled.
 </p>
 </noscript>
 </div>
 <?php
   // This section sets up javascript needed by BookReader
   $lp->HTMLPageBottom();
   echo "<script>\n".
   "  var br = new BookReader();\n".
   "  var CurPageIndex = 0;\n" .
   "  var PgIDs = [$lp->PageIDs];\n".
   "  br.pageWidths = [$lp->PageWidths];\n".
   "  br.pageHeights = [$lp->PageHeights];\n".
   "  br.BookKey = '$BookKey';\n" .
   "  br.numLeafs = $lp->PageCount;\n".
   "  br.bookTitle = \"Demo\";\n" .
   "  br.bookUrl = \"Demo\";\n" .
   "  br.logoURL = \"Demo\";\n" .
   "  SetupBookReader( br );\n";
 ?>
 br.init();
 // Disable items as needed
 $('#BRtoolbar').find('.read').hide();
 $('.info').hide();
 $('.thumb').hide();
 </script>
Basically, all we are doing in the above code is calling the LoadPages method of the LP class to load data, and then using it in the javascript near the end.
lp.php
Finally, we get to the core of the Library Pi coding, lp.php. This php module will create the LP class that we have used in all the other PHP files and allows us to keep them simple and light modules. To keep this page simple, we are not listing the entire contents of this file, just describing the methods in it and some key points. Please see the download links to retrieve the lp.php class file.
One of the first things to noe about lp.php is that it includes lp_dbconf.php in order to gain access to the database files.
Functions in the LP class:
function HTMLPageTop( $Title = “LibraryPi”, $Header=””, $Script=”” )
function HTMLPageBottom( $Script = ” )
These methods output consistent page tops and bottoms, including a menu on the top. It makes creating consistent pages easier and will help later with authentication.
function UKey()
Generates a unique 32-character key for each book
function AddBook( $Title )
Accepts an uploaded ZIP file, and decompresses the JPG files into the uploads folder. It then adds each file into the lp_page table, as well as a book record into the lp_book table.
function BookList()
Returns a list of records in the lp_book table in HTML format, with a link to the reader.php page to read that book.
function LoadPages( $BookKey )
Loads the pages for a specific book, and provides access to things like how many pages, page dimensions and so on. This information is used by the reader.php file, to hand off data needed to the Internet Archive BookReader component in order to view books.
function GetPageFilename( $BookKey, $PageID )
This function is called to return a URL for a specific page in a book. The BookReader component will need this data to display pages.
function OutputPageAndExit( $BookKey, $PageID )
This method will open a page JPG file and output it. This is alao used by BookReader to display pages.
reader.js
The reader.js file is used by reader.php. It contains much of the code required to implement the BookReader component. Most of the code is described in the BookReader website, as well in the BookReader demo pages. The BookReader component needs to know the width and height for the pages it is going to display, as well as a URI that can be used to display the JPG file for the page.
In our implementation, we are implementing JavaScript arrays to keep the ID, width, and height for all the pages. The specialized code that we are implementing in this file, that will use these arrays, are as follows:
br.getPageWidth = function (index) {
 return this.pageWidths[ index ];
 }
br.getPageHeight = function (index) {
 return this.pageHeights[ index ];
 }
br.getPageURI = function (index, reduce, rotate) {
 url = "util.php?act=pj&bk=" + this.BookKey + "&pid=" + PgIDs[ index ];
 return url;
 }
You can see now how the BookReader component knows to call out util.php module for displaying images, thanks to the getPageURI method above.
Testing Stage 1
If you don’t have a sample book, download one here:
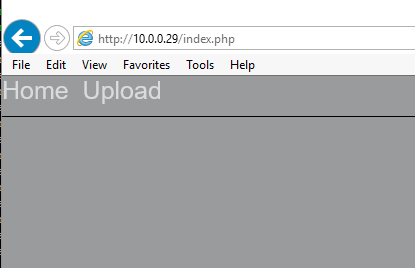
With our MySQL tables created, and all the PHP files in place (and proper lp_dbconf.php settings), we should be able to access the main page:
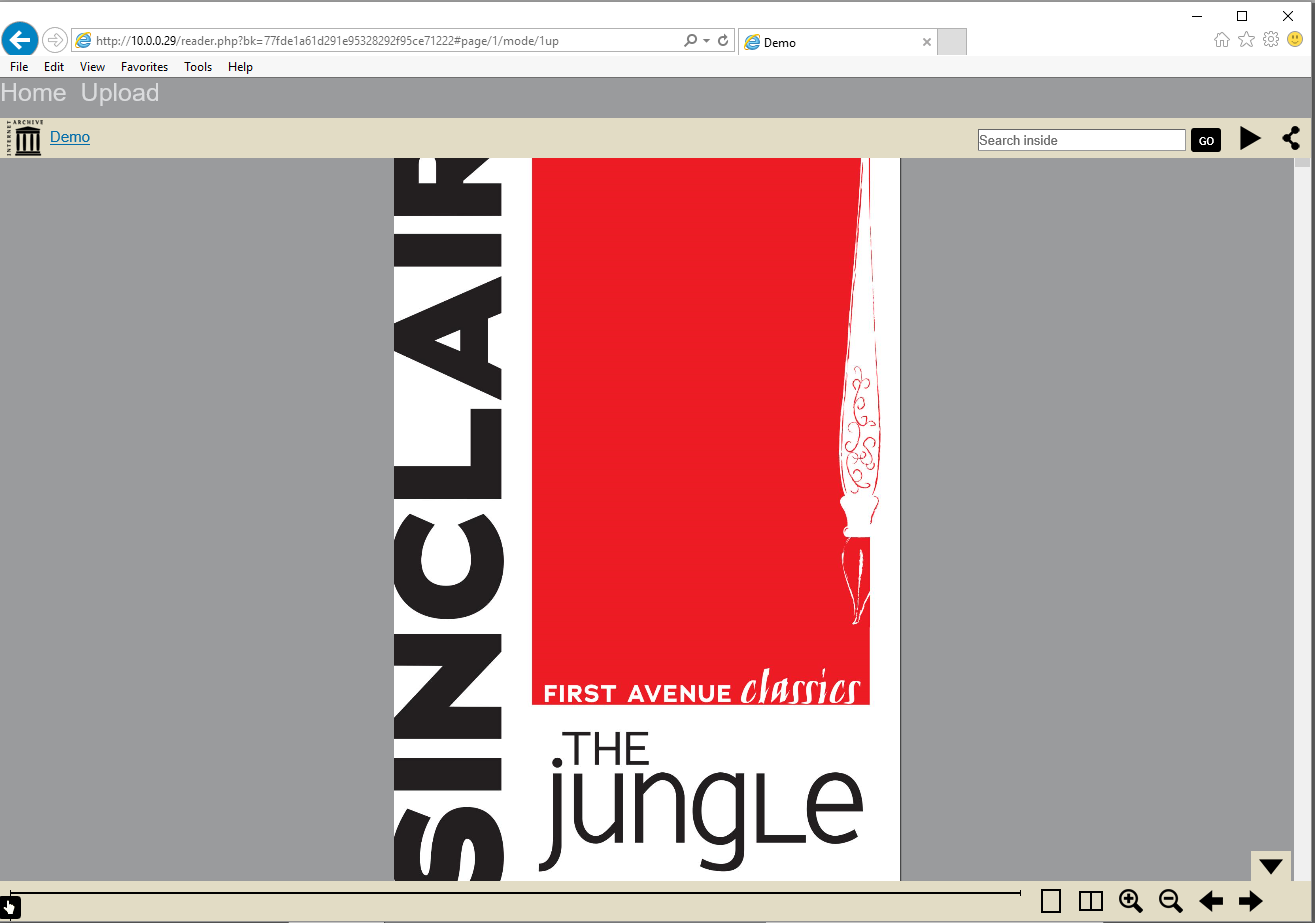
Click the Upload link, then enter The Jungle for the title, and use the TheJungle.zip demo file, then click Upload:

The page should then show ‘Uploaded’ (it may take some time to upload, be patient). Click the Home link to go back to the home page, and you should now see the book listed:

Clicking that link, should show the BookReader:
Proceed to Stage 2 to start adding the OCR and text searching abilities.